Preparing for Successful Toner Cartridge Replacement
Understanding Your Printer Model
Nearly 70% of printer issues stem from improper toner cartridge installation. Before diving into the process, it’s crucial to understand your specific printer model. Each device has unique requirements that can affect the success of toner cartridge installation. Skipping this step can lead to costly damage or repeated errors. Take a moment to locate your printer’s model number and consult the user manual or manufacturer’s website for detailed instructions.
Knowing your printer model ensures you select the right toner cartridge. Some models require specific types or sizes, and using the wrong one can cause jams or print quality issues. To streamline your toner cartridge installation, gather all necessary tools and components beforehand. Remember, a smooth replacement begins with proper preparation and knowledge of your printer’s specifications.
Gathering Necessary Tools and Supplies
Preparing for successful toner cartridge installation isn’t merely about having the right tools—it’s about cultivating a mindset of patience and precision. A well-prepared workspace can transform a potentially frustrating task into a seamless ritual, saving you time and preventing damage. Before you begin, gather all necessary supplies, ensuring nothing disrupts the flow of the process. This includes a lint-free cloth, gloves to avoid smudges, and a clean surface to place the cartridge on.
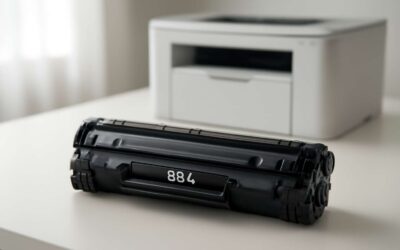
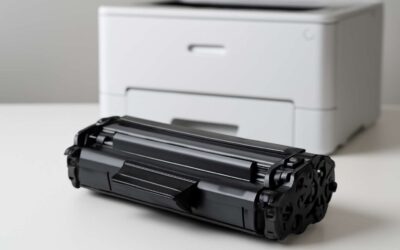
- Replacement toner cartridge
- Lint-free cloth
- Latex or nitrile gloves
- Manufacturer’s user manual
- Compressed air (optional for cleaning)
Taking these steps early on guarantees that your toner cartridge installation proceeds smoothly, safeguarding your printer’s longevity and print quality. Remember, preparation isn’t just about convenience; it’s an act of respect for your equipment’s delicate inner workings. Your careful approach will resonate in every print, every page, echoing the silent integrity of a job well done.”
Safety Precautions and Handling Tips
Handling toner cartridges requires more than just a steady hand; safety precautions are essential to prevent damage to your printer and ensure your well-being. Toner dust, although seemingly harmless, can cause respiratory irritation if inhaled in significant quantities. Always wear latex or nitrile gloves during toner cartridge installation to avoid smudging your hands and contaminating the new cartridge. This simple step preserves print quality and keeps your workspace clean.
When removing an old toner cartridge, be cautious to avoid spilling excess toner inside the printer. Some models contain residual toner that can settle on surfaces, creating a mess and potentially affecting the print output. To minimize this risk, handle cartridges gently and follow the manufacturer’s handling tips. Using compressed air to clean the printer’s interior can also help remove any lingering toner particles, promoting optimal performance.
Remember, safety and proper handling are critical components of successful toner cartridge installation. Taking these precautions not only prolongs your printer’s lifespan but also ensures every print remains sharp and clear, reflecting a meticulous approach to maintenance that benefits your workflow and bottom line.
Step-by-Step Guide to Installing a Toner Cartridge
Accessing the Toner Cartridge Compartment
Getting to the toner cartridge compartment is a crucial step in the toner cartridge installation process. Most printers have a designated access panel that you can open to reach the toner. This panel is often located at the front or top of the device. Carefully lift or slide it open, making sure not to force anything. Once the access point is revealed, you’ll see the old toner cartridge nestled inside, ready for removal.
To access the toner cartridge compartment efficiently, follow these steps:
- Turn off the printer and unplug it from the power source for safety.
- Open the front or top cover to expose the toner compartment.
- Locate the toner cartridge inside the compartment.
With the compartment open, you’re ready to proceed with the toner cartridge installation. Remember, patience and a gentle touch prevent damage to sensitive components. Properly accessing the toner compartment sets the stage for a smooth and successful replacement process, ensuring your prints stay crisp and professional.
Removing the Old Toner Cartridge
Lifting the old toner cartridge from its cradle requires a gentle yet deliberate approach. When you grasp the cartridge, feel the slight resistance—an indication that it’s securely seated but ready to be removed. Carefully tilt or pull it straight out, avoiding any abrupt movements that might damage sensitive components inside the printer.
In many models, the toner cartridge is held in place by clips or guides, which can be disengaged with a firm but gentle hand. Once free, inspect the cartridge for any residual toner that might spill—this is a natural part of toner cartridge installation, reminding us of the delicate balance between technology and human care.
Some printers may require you to remove a protective cover or seal from the new cartridge before installing it. During this process, patience is key. Rushing could lead to misalignment or damage, jeopardizing your entire toner replacement endeavor. By respecting the integrity of each component, you ensure a seamless toner cartridge installation that keeps your printer functioning at peak performance.
Preparing the New Toner Cartridge for Installation
Preparing the new toner cartridge for installation is an act of quiet reverence, a ritual that bridges the mechanical with the meticulous. Before you embark on this process, gently shake the toner cartridge side to side—this redistributes the toner evenly and prevents unsightly streaks on your printed pages. Carefully remove the protective cover or seal, a delicate operation that demands patience and a keen eye for detail. Rushing through this step risks misalignment or damage, a reminder that toner cartridge installation is as much about respecting the integrity of your equipment as it is about efficiency.
To ensure a seamless transition, consider the following steps:
- Remove any packaging or protective tape from the new cartridge.
- Inspect the cartridge for residual toner or debris, wiping gently if necessary.
- Align the cartridge with the guides or clips, feeling the subtle click that signals proper seating.
Every element of this process—each gentle motion and mindful pause—serves as an ode to the intricate dance between human touch and technological precision. When performed with care, toner cartridge installation transforms from a mundane task into an act of restoration, breathing new life into your printer’s capacity for excellence.
Installing the New Toner Cartridge
Embarking on toner cartridge installation is more than just a routine task; it’s a ritual that sustains the heartbeat of your office workflow. Once you’ve accessed the toner compartment and removed the old cartridge, the moment arrives to introduce the new one. Carefully unpack the toner cartridge, ensuring you avoid contact with the toner powder to prevent smudges and clumping. Gently shake the cartridge side to side—this redistributes the toner evenly, ensuring optimal print quality.
Next, align the cartridge with the guides or clips inside the printer. For a seamless fit, follow these simple steps:
- Insert the toner cartridge firmly into the designated slot, feeling for the subtle click that confirms proper engagement.
- Ensure the cartridge is seated evenly, avoiding any tilting or misalignment that could compromise print clarity.
- Close the printer cover securely, listening for the reassuring snap that indicates everything is in place.
Every phase of toner cartridge installation demands patience and a keen eye, transforming a mechanical task into an act of precision—an essential dance between human touch and technological grace. Proper installation not only preserves your printer’s longevity but also guarantees the crisp, professional output your business relies on. In an era where clarity and efficiency define success, mastering toner cartridge installation becomes a quiet affirmation of quality in every printed page.
Securing the Cartridge and Closing the Compartment
As the final act in the ritual of toner cartridge installation, securing the new cartridge and closing the compartment is a delicate dance that demands both patience and precision. Imagine the printer as a mythical creature awakening from slumber; each step you take must be deliberate to ensure it breathes life into your documents with clarity and strength. The moment arrives to gently press the toner cartridge into its designated slot, feeling for that satisfying click—an echo of harmony between human touch and mechanical grace.
Once the cartridge is firmly in place, it’s vital to secure the compartment lid. Carefully align the cover with its hinges or guides, and close it with a gentle snap, ensuring it’s sealed tight. This step is often overlooked but crucial—an unsealed compartment can lead to misaligned printing or toner leaks, impairing print quality. Remember, in the realm of toner cartridge installation, every detail counts. A securely closed compartment not only preserves the integrity of the toner but also extends the longevity of your printer, safeguarding your workflow against unexpected interruptions.
Tips for Troubleshooting Common Installation Issues
Printer Not Recognizing the New Cartridge
A common frustration during toner cartridge installation is the printer refusing to recognize the new cartridge. This hiccup can stem from a few simple issues. Sometimes, the cartridge isn’t inserted correctly or isn’t aligned properly. Other times, the contacts might be dirty or misaligned, preventing the printer from establishing a proper connection.
To troubleshoot, first ensure the toner cartridge is seated firmly. If recognition still fails, gently remove the cartridge and inspect the contacts for dust, toner residue, or damage. Clean them with a soft, lint-free cloth.
If these steps don’t resolve the problem, double-check that you’ve used the correct toner cartridge for your specific printer model. Using incompatible cartridges often leads to recognition issues.
- Double-check compatibility and model numbers
- Reinstall the toner cartridge carefully
- Clean the electrical contacts
Persistent issues might require resetting the printer or updating its firmware. Troubleshooting common toner cartridge installation problems can save time and prevent unnecessary replacements.
Poor Print Quality or Streaks
When the print quality suddenly plummets into streaks or smudges, it’s as if your printer is whispering a secret: something’s wrong with the toner cartridge installation. These imperfections can be maddening, but often, the culprit is a simple misalignment or dust lurking on the toner cartridge contacts. A quick inspection can reveal if toner residue or dirt is blocking proper contact, causing poor print quality or streaks.
To restore clarity, gently clean the contacts with a soft, lint-free cloth—sometimes, dirt buildup is enough to sabotage the entire toner cartridge installation. If streaks persist, consider checking the toner cartridge for even distribution of toner powder. Uneven spread can also be a silent assassin.
Sometimes, running a cleaning cycle or performing a firmware update on your printer can work wonders. Remember, even the most advanced machinery is vulnerable to tiny dust particles that can compromise toner cartridge installation and printing performance. Staying attentive to these details keeps your printer in peak condition and your workflow seamless.
Reinstalling the Toner Cartridge
Sometimes, even a seasoned technician stumbles at the altar of toner cartridge installation. When the printer refuses to recognize the new cartridge or prints with faint, inconsistent tones, it’s a sign something’s amiss. Reinstalling the toner cartridge might seem straightforward, but a misstep can cause lingering issues. The secret lies in technique—carefully aligning the cartridge and ensuring it clicks securely into place.
To troubleshoot common installation issues, start by ejecting the toner cartridge and inspecting the contact points for dust or misalignment. A quick wipe with a soft cloth can often remove debris that hinders proper connection. When reinserting, follow these steps for smooth toner cartridge installation:
- Align the cartridge precisely with the guides.
- Apply gentle pressure until you hear a definite click.
- Double-check that it’s seated firmly, with no wobbling.
If problems persist, remove the cartridge once more and examine the chip or contact area for damage. Sometimes, a simple reset of the printer after reinstallation can resolve recognition issues, restoring optimal print quality. Remember, the devil is in the details—each step in toner cartridge installation carries the potential to make or break your printing experience.
Resetting Printer Settings after Installation
Even the most seasoned printers can throw a tantrum after a seemingly simple toner cartridge installation. Printer recognition hiccups or faint, streaky prints? That’s often a sign it’s time for a quick reset. Resetting your printer after installing a new toner cartridge can be the magic fix—sometimes, the machine just needs a gentle nudge to acknowledge its shiny new partner.
Start by turning the printer off and unplugging it. Wait a few moments—patience is key here. Once powered down, power it back on and navigate to the printer’s menu to reset the settings. Many models have a dedicated reset option, but if not, a simple restart often suffices to clear recognition errors caused by subpar toner cartridge installation.
- Turn off the printer and disconnect from power.
- Reinstall the toner cartridge, ensuring it clicks into place.
- Reconnect the power and turn the printer back on.
- Access the settings menu and perform a reset if available.
Sometimes, a quick reset can be the difference between a printer that stubbornly refuses to acknowledge its new toner cartridge and one that happily produces crisp, professional prints. Remember, even in the world of toner cartridge installation, the devil’s in the details—so don’t skip this crucial troubleshooting step!
Maintenance and Care for Longevity
Proper Storage of Spare Toner Cartridges
Proper maintenance and care are the unsung heroes behind extending the lifespan of your toner cartridge. Think of it as giving your printer a spa day—only less cucumber slices and more diligent handling. When stored correctly, spare toner cartridges can sit patiently in your cupboard for months without turning into a dusty paperweight. The key? Keep them in a cool, dry place, away from direct sunlight or extreme temperatures that could cause the toner to clump or become unusable.
For optimal toner cartridge installation and longevity, consider these storage tips:
- Seal cartridges tightly in their original packaging or airtight containers.
- Avoid shaking or jarring the cartridge unnecessarily—think of it as a delicate dance, not a boxing match.
- Store cartridges upright to prevent toner spillage and uneven distribution.
By respecting these simple storage protocols, you ensure that each toner cartridge installation is smooth, quick, and results in crisp, professional prints every time. After all, a well-cared-for cartridge is the secret ingredient to avoiding future print disasters—no more streaks, smudges, or ghostly images! Proper storage isn’t just a detail; it’s the cornerstone of printer efficiency and cost-effectiveness in the long run.
Regular Cleaning and Inspection
Regular cleaning and inspection are vital for prolonging the life of your toner cartridge after installation. Dust, toner residue, and paper debris can silently erode print quality over time, leading to streaks, smudges, and uneven images. Taking a few moments to examine your printer and toner cartridge can save you from costly repairs and frustrating downtime. During routine maintenance, look for signs of toner buildup or damage, and gently clean the cartridge with a soft, lint-free cloth. Remember, a well-maintained toner cartridge ensures each toner cartridge installation delivers crisp, professional results that stand the test of time.
To make the process seamless, consider following these simple steps:
- Turn off the printer and unplug it for safety.
- Remove the toner cartridge carefully, avoiding any shaking or jarring.
- Inspect for toner leaks or damage, and clean any dust from the surrounding area.
- Reinstall the cartridge firmly, ensuring it clicks into place properly.
With consistent maintenance and care, each toner cartridge installation becomes a routine that guarantees optimal print quality and extends your printer’s longevity. It’s a small effort that makes a big difference in maintaining efficiency and reducing unnecessary expenses—because a well-cared-for cartridge is the backbone of professional printing every time.
When to Replace Your Toner Cartridge
In the quiet symphony of professional printing, the longevity of your toner cartridge hinges on vigilant maintenance and tender care. Each print is a fleeting masterpiece, yet beneath its surface lies the potential for enduring brilliance—if nurtured properly. A neglected toner cartridge, like a fading melody, can compromise clarity and precision, turning crisp images into blurry echoes of their former glory.
To preserve the integrity of your print quality, it is essential to schedule regular inspections and gentle cleanings. Dust, toner residue, and paper debris are insidious foes that silently erode your output. When you approach your printer with a soft, lint-free cloth, you breathe new life into the cartridge, ensuring each toner cartridge installation continues to deliver professional results that withstand the tests of time.
- Turn off and unplug your machine—respect the silence before the storm of printing resumes.
- Remove the toner cartridge carefully, maintaining a delicate touch to prevent jarring the internal mechanisms.
- Inspect for leaks, damage, or toner buildup, and gently wipe away any debris to keep the pathway clear for pristine printing.
- Reinstall the cartridge with a firm, confident click—securing its place in the symphony of your office’s productivity.
With each deliberate step, the lifespan of your toner cartridge extends, reducing the frequency of replacements and ensuring your printer remains a vessel of excellence. Remember, the true artistry of toner cartridge installation is not just in the moment of change but in the ongoing devotion to care—transforming routine maintenance into a ritual of enduring clarity and efficiency.
Choosing the Right Toner Cartridge for Your Printer
OEM vs. Compatible Cartridges
Choosing the right toner cartridge for your printer can feel like navigating a labyrinth—each option promising different benefits. When it comes to toner cartridge installation, understanding whether to opt for OEM (Original Equipment Manufacturer) or compatible cartridges can significantly impact your printing experience. OEM cartridges are crafted by the printer’s manufacturer, ensuring compatibility and consistent quality. They often deliver sharper images and more reliable performance, which is essential for professional documents or important presentations.
However, compatible cartridges—produced by third-party manufacturers—offer a compelling alternative. These cartridges are usually more affordable, providing a cost-effective solution without sacrificing too much quality. Still, some users worry about potential compatibility issues or reduced print clarity. Balancing cost and quality requires careful consideration, especially when contemplating toner cartridge installation.
- OEM cartridges guarantee original quality but tend to be pricier.
- Compatible cartridges can cut costs but may vary in performance.
- Careful selection impacts the longevity and efficiency of your printer.
In the end, selecting the right toner cartridge hinges on your specific needs and budget—knowing what to choose can make all the difference in the success of your toner cartridge installation.
Compatibility Check Before Purchase
Choosing the right toner cartridge for your printer is a task that demands both precision and intuition. Compatibility check before purchase becomes the cornerstone of a successful toner cartridge installation, ensuring that each component harmonizes seamlessly. An incompatible cartridge can lead to frustrating print errors or even damage to your device, turning a simple task into a costly ordeal.
To avoid these pitfalls, always verify your printer model against the cartridge specifications. Many printers require specific toner cartridges that are engineered to meet exacting standards. Sometimes, this involves cross-referencing serial numbers or consulting the manufacturer’s compatibility list.
Remember, a well-informed choice not only simplifies toner cartridge installation but also prolongs your printer’s lifespan, saving you time and money in the long run. Embracing this meticulous approach transforms a mundane task into a testament to your commitment to quality and efficiency.
Environmental Considerations and Recycling
As guardians of the environment and champions of sustainability, we often overlook the profound impact our choice of toner cartridges can have on our planet. Every year, millions of toner cartridges end up in landfills, contributing to pollution and resource depletion. When considering toner cartridge installation, it’s crucial not only to select the right cartridge but also to embrace eco-friendly practices that support our collective ecological well-being.
Recycling unused or spent toner cartridges is a vital step in this journey. Many manufacturers and retailers in South Africa offer robust recycling programs, transforming what seems like waste into valuable resources. By participating in these initiatives, you help reduce landfill overflow and conserve the raw materials needed for new cartridges.
Furthermore, opting for remanufactured or compatible toner cartridges can significantly lessen environmental impact while often providing cost-effective solutions.
- Check local recycling centers for drop-off points
- Use manufacturer-approved recycling envelopes
- Support brands committed to sustainable practices
In the grand tapestry of toner cartridge installation, environmental considerations weave a thread of responsibility and foresight. Every choice echoes beyond the immediate task, shaping a cleaner, greener future for South Africa and beyond.


0 Comments